WARNING: I TOOK EVERY PRECAUTION AND THE DRIVE STILL DIED. (they're touchier than I thought)
June 1st, 2003.
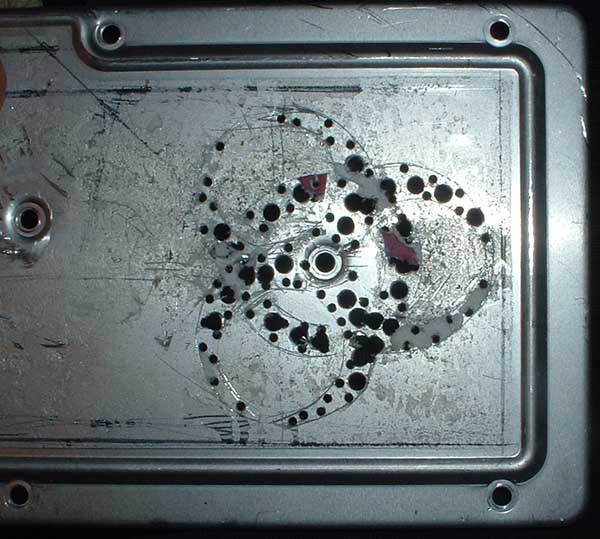
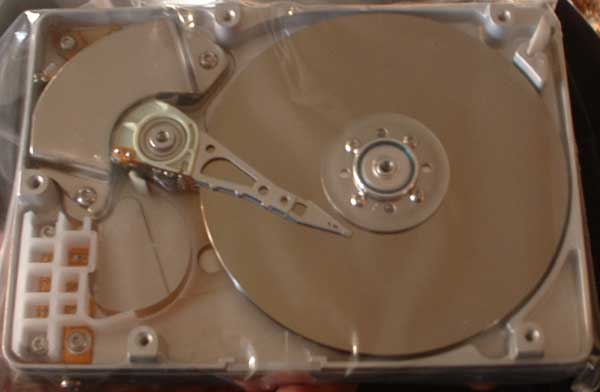
I'm working on puting a window in my old WD 2GB hard drive (all the data is off it, I have been using it for mp3 storage but my 40GB holds more and is faster, therefore I really don't care about this drive). It's still in process but on pause for now till my dad's dremel tool arrives and I can make some of the finer cuts. Yep, it's a biohazard symbol, not unique to the modding community but I haven't seen anybody cut anything more than circles or rectangles out of their hard drives, so I'll be prety happy with myself if I can get it to come out right. The hole in the center screws into the center of the spindle, so this cutout will be right above the platters, but only part of it will show the head seeking over the disk, so it may or may not be as cool as I hope it will. Worse comes to worse and I don't like it or mess it up, I can always cut around the raised area on the edge of the lid and have it be like everyone else's.
|
|
|
|
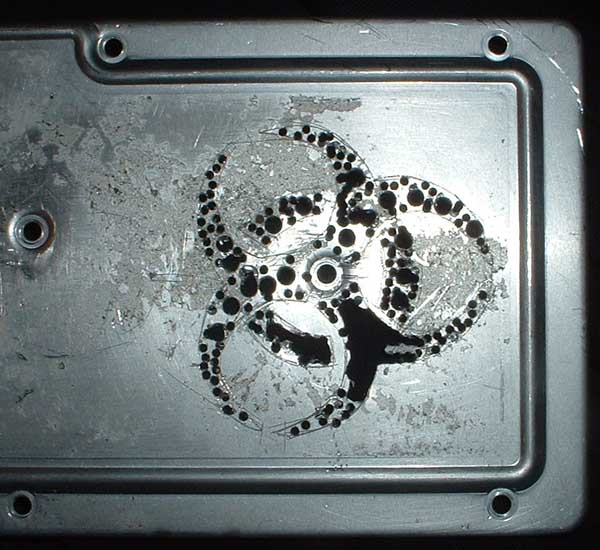
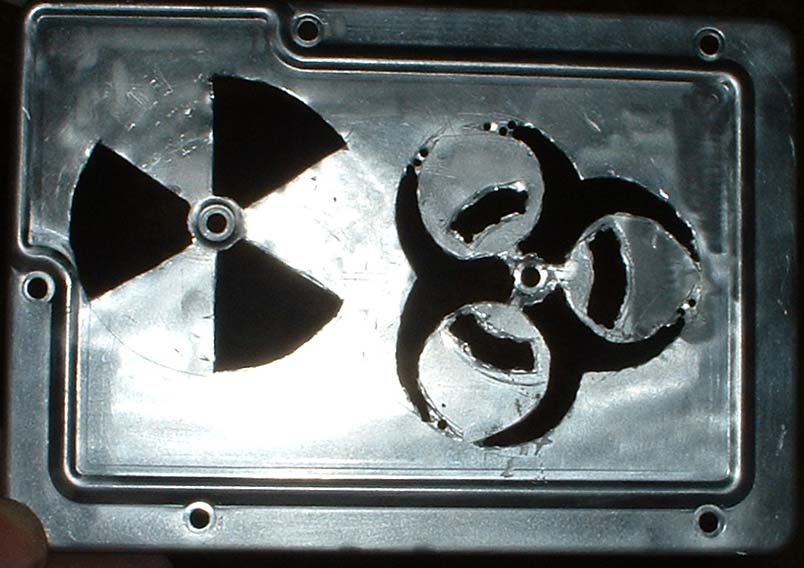
updated june 3rd: The discoloration on the surface is the adhesive
from the metal plate that sits on top of the drive. I cleaned it before the
4th picture with some goo gone. I also added an impromptu radiation symbol around
the bottom hole that screws into the center of the read/write arm to provide
more of a view of it moving back and forth. I'm still waiting on the dremel
to clean up all the edges. I think I'm going to use a wire brush in the dremel
to give the whole hard drive a brushed look and to clean up alot of my scratches
etc. I'm also thinking of painting the whole drive but that would be rather
hard to mask off the bottom of the drive and the connections.
here's my hard drive safe in it's ziplock baggie.
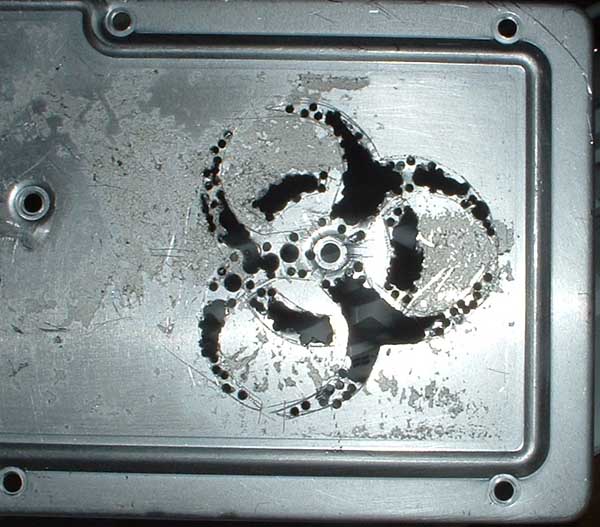
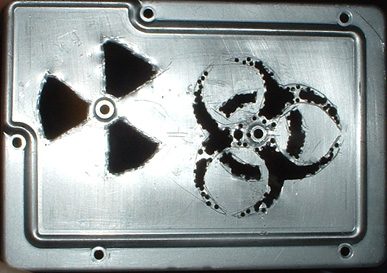
Updated june 5th: I got the dremel today, my dad decided to buy me a new one of my own, did most of the work on the drive today but the very tips of the biohazard symbol, I have to figure out how to get those done without mangling stuff. I also have some work to do on the center of the biohazard and the rings around the middle. I took a pic of the top and the top covering the drive (still in it's baggie) to see what it'll look like, definitely needs a LED or 2. if I can fenagle it I might put a red one under the biohazard and a yelow one under the radioactive symbol. :)
 |
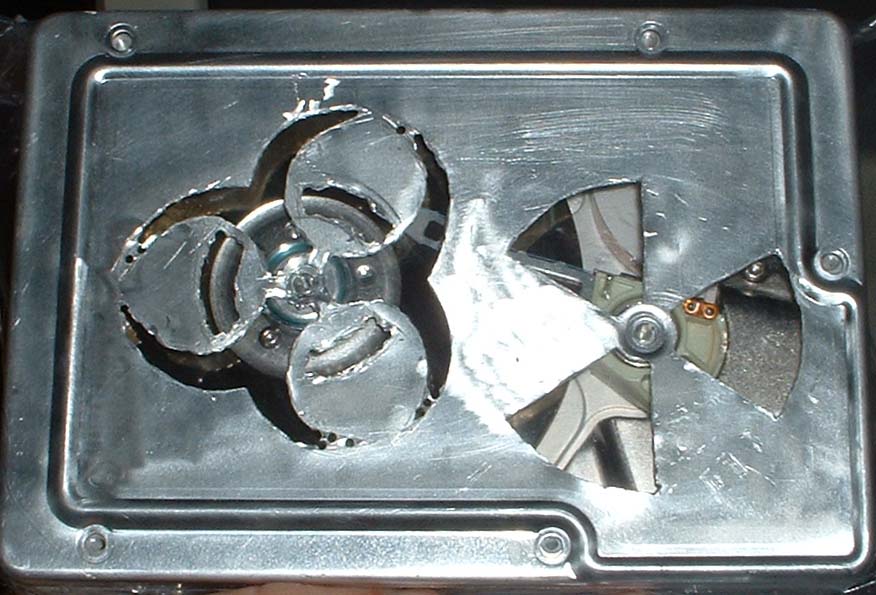 |
I went over the surface of the drive with a wire brush attachment and it polished the drive up pretty nice, then I found another wire brush that gave it a more 'brushed aluminum' look, which you can see in the middle of the second pic between the symbols, I'm still experimenting with what to do, but I have to figure out some way to hide all the little dings and scratches and stuff that I've put into it between prying the metal thing off and all this carving and cutting and such.
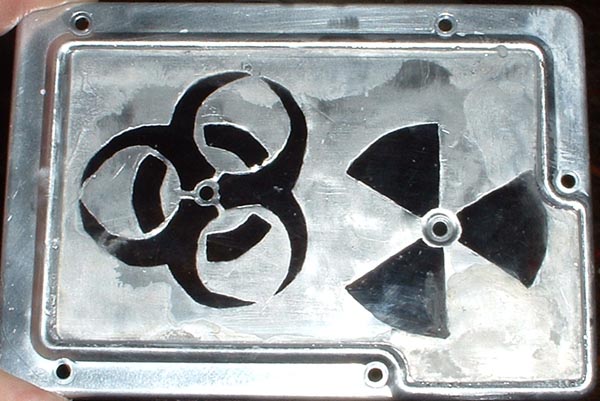
Update june 13th (early am) second to last update, the next one will be the final product. I got the cutting done and glued the window on. the glue I used discolored the plastic a little and I happened to get a thumbprint over the biohazard symbol that won't come off. oh well such is life. here's a couple pics. all that's left is a little lighting and to put it back together and hook it up to make sure it worked. heh, I hope it works. :-p
 |
 |
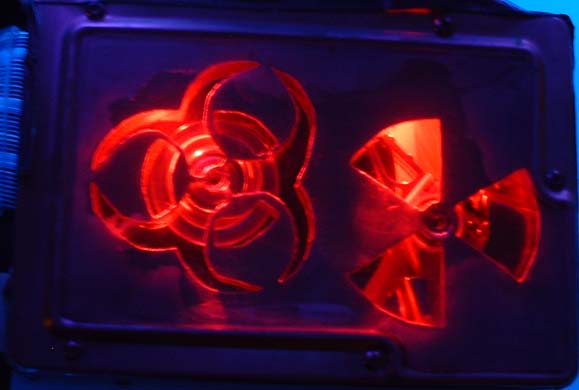
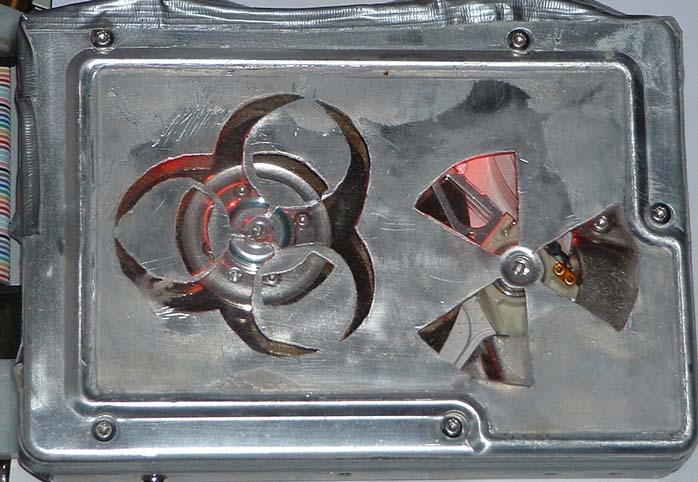
Final update, June 15th. I got a pair of red wide angle LEDs from radio shack and wired them and glued them into the lid of the drive. I ran the shower for a few minutes and, under UV light, used a piece of tape to pull all the last specks of dust off the inside of the drive lid. Icarefully opened my baggie and put the lid on top, then brought the drive out of the bag. I quickly taped up the edges of the drive (didn't have electrical tape so I used thin slices of duct tape) together then screwed it all in. I added tape over the backs of the LEDs so there wouldn't be any air gaps. I tested the LEDs with a spare power supply and they worked, I also powered the drive and it spun up. Then I hooked the drive back up to the computer. I booted, bios found the drive no problem. then came time to make a partition, no problem for win2k, though a quick format in NTFS failed. a slow format in NTFS got 5% of the way through before the drive went nuts and started banging the read head into the park position, making the Evil Click of Death™ sound. Quickformat of FAT32 failed, though quciformat of FAT worked. scandisk after quickformat in FAT hit the same problem as NTFS slow fromat. Diagnosis: dead hard drive. Dead hard drive that looks hella cool, but dead hard drive. What is it that they say about ying young and leaving a pretty corpse? First pic is with no flash, blue/purple lights from my blacklight. Second pic is with flash. The disk is on in both pics, the shutter is apparently fast enough with the flash to catch the disk in mid rotation.
 |
 |
Conclusion: When done right I know a hard drive window mod can work. I apparently wasn't careful enough somewhere along the line and managed to do something wrong. My best guess at this point is (if you'll notice the date I started) that the drive was in the ziplock baggie too long. 2 weeks without it's usual shielding against whatever's out there electromagnetically and physically, not to mention 2 weeks in, on, and around my computer desk, can't be good for a hard drive. I am almost positive I didn't get any dust in the drive. even now when I wipe the top, I can't see anything inside with the UV light. Hell, it could have been the fact that the drive spent much of it's uncovered time atop my 19in CRT monitor, lord knows those things put out a ton of EMI/magnetic fields. I still like my mod. I think the red LEDs and the cutting on the window look awesome. In fact, I'm deeming the whole thing a minor success, cause I'm still going to be able to put this in a case with a window on it and have it look cool. hell, I might even power it when it's in said future case. Chalk it up to a learning experience, next time I'll be alot more careful about how I handle the drive. I'll try to do everything in one afternoon, have all my tools and parts ahead of time (this mod was totally unplanned, I was sitting around wondering what to do next while waiting for money for watercooling parts when I remembered the 2gb drive that I could play with) and plan out what I'm going to cut, how I'm going to cut it and where the lights and things will go. I'll have a room with a hepa filter runnign in it for several hours ahead of time, have a clean static proof bag as well as ziplock bag, and keep the whole thing away from magnetic fields. I'm still going to keep this page up becaus it'll be the first and only failed hard drive mod page I've ever seen. (I have to believe the other guys out there have messed up one or 2 before getting it right)
if you do one that works (especially if you used my design w/ biohazard and radioactive or used my page as instructions/inspiration) please email me at psychoi3oy@linkline-NOSPAM-.com